$179.99
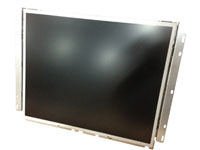
19 inch CGA-EGA-VGA-SVGA LCD arcade monitor
Quantity Left: 0
From the Internet
Is it possible to use the picture tube from one monitor with the chassis
of another? Sure! Under certain conditions that is.
First of all, when would you ever want to do such a thing? Well, perhaps
you have a perfectly good CRT but the monitor chassis has been lost or
damaged beyond repair. Sitting on the shelf next to it is a monitor that
works perfectly well but the phosphors are burned so badly that the
picture tube looks horrible. A host of other maladies can befall CRTs,
making them unusable. Wouldn't it be nice to mate the good picture tube
with the fully functioning monitor chassis and create one good working
monitor from the two bad ones? Sure it would!
How can you tell if the picture tube of one monitor will match the
electronics of another? While there is no hard and fast rule for making
these types of exchanges (transplants?) there are three things that I
look for when I want to determine if I can swap picture tubes: The
resistance of the deflection coils in the yoke, the neck size of the
picture tube, and the pinouts of the CRT socket.
Use the Existing Yoke
Whenever possible, try to use the existing yoke that's already mounted on
the picture tube. The position of the yoke is critical to the proper
alignment of the three electron beams that shoot out of the red, green
and blue electron guns. If the yoke is not mounted perfectly, the colors
will be all messed up. The monitor will be out of "convergence". It will
probably be especially noticeable at the edges of the picture. If it's
possible to leave the existing yoke in place, the factory alignment of
the CRT will be preserved.
How can you tell if the yoke will work with the different monitor chassis?
You can usually be assured of a pretty good match by using your meter to
measure the DC resistance of each of the two coils in the yoke. The
horizontal deflection coil will have a low resistance. Somewhere around 2.
4 ohms is typical for 13" or 19" monitors. Larger monitors such as 25"
and 33" may have even lower resistances (as low as 1.3 ohms) as higher
current levels are required to deflect the electron beams.
The resistance of the vertical deflection coil may vary quite a bit. The
resistance in some monitors may be around 56 ohms. In others, the
resistance of the vertical deflection coil may be approximately 15 ohms
or less. As with the horizontal deflection coil, the resistance drops as
the size of the picture tube increases. The resistance of the vertical
deflection coil for a 25" or 33" CRT may be as low as 9 ohms.
Compare the resistances of the yoke coils on the bad CRT with the yoke on
the good picture tube. If they're the same (or even pretty close) it will
probably work. If you don't have the other yoke to compare to, you can
try connecting it up just to see what happens. However, it is possible
that this may cause an overload situation if the monitor chassis is
trying to power a yoke with too low a resistance. If the picture looks
really distorted, the yoke is probably incompatible with the monitor
chassis. Don't leave it on too long as you may damage the monitor
circuitry. Most incompatibilities seem to show up in the vertical
deflection coil of the yoke as they vary quite a bit in resistance.
Swapping Yokes
One way around the problem of yoke incompatibility is to use the yoke off
the bad CRT and install it on the good picture tube. Swapping yokes
requires removal and replacement of the purity and convergence ring
assembly. This set of magnetic rings is used to align the three beams in
the CRT. Since it sits between the yoke and the end of the picture tube,
it has to be pulled off to allow the yoke to slide off after it.
If you mark the position of the purity and convergence ring assembly with
a marking pen (like a Sanford "Sharpie" or Dennison "Marks-a-lot") prior
to removal, you should be able to put it back in the exact position
required for proper convergence. Its position on the neck and the
rotation of the ring assembly are both critical, so be sure to mark both
before removing the assembly for the neck of the picture tube.
After marking the position, loosen the screw that clamps the ring
assembly in place and carefully slide it off the neck of the CRT. The
ring assembly may be quite fragile due to extended exposure to the heat
of the glowing CRT neck, so be cautious when you handle it.
Mark the position of the existing yoke on the neck of the good CRT.
Loosen the yoke clamp and slide it off the neck of the picture tube.
Don't throw it away! You may want to use it for a future transplant. Also,
if the two yoke connectors are different, you'll want to remove the yoke
wires and connector from the old yoke and install them on the replacement
yoke. Be sure to mark which wires are for vertical and which are for
horizontal! Remember, the horizontal pair has a much lower resistance
than the vertical pair. If you screw this up, you'll probably blow out
the vertical output transistors or fry some resistors on the monitor
chassis.
Reinstall the replacement yoke in the exact same position on the CRT. Do
the same with the purity and convergence ring assembly. With everything
hooked up (and if you're lucky) you should have a perfectly good picture.
If the picture is slightly out of convergence (the red, green and blue
components of the picture not all lined-up properly) try rocking the yoke
slightly back and forth to bring the edges into proper alignment. Use the
yoke wedges and clamp the yoke in place when you have a good picture. You
should not have to touch the ring assembly as it has already been set for
that tube. The ring assembly stays with its own picture tube and does not
get swapped with the yoke! If you cannot converge the picture tube, you
may have to go through the entire convergence procedure as outlined in
the service manual. This can be a real pain but if the picture is
unacceptable you'll have to do it.
Check the CRT
Of course, the yoke is only one of your considerations when you're
swapping picture tubes. The other is the CRT itself. Look at the neck of
the picture tube. Is it fat or skinny? We have two common sizes: 22.5
millimeter and 29.0 millimeter. Naturally, you cannot swap picture tubes
if the neck diameter is different. I strongly discourage the swapping of
neck boards between monitors! The neck board of a monitor is an integral
part of the entire monitor design and should stay with the original
monitor. Neck boards are not designed to be interchanged between monitor
chassis!
If the neck size is the same, the swap will probably work. There are
standard pinouts for the majority of the CRTs we use in videogames. For
the 29.0mm neck size, the pinouts are as follows:
pin 1 - G3 (focus grid)
pin 2 - not used
pin 3 - not used
pin 4 - not used
pin 5 - G1 (control grid)
pin 6 - GK (green cathode)
pin 7 - G2 (screen grid)
pin 8 - RK (red cathode)
pin 9 - H (heater)
pin 10 - H (heater)
pin 11 - BK (blue cathode)
For the 22.5mm neck size, the pinouts are as follows:
pin 1 - G3 (focus grid)
pin 2 - not used
pin 3 - BK (blue cathode)
pin 4 - H (heater)
pin 5 - H (heater)
pin 6 - G1 (control grid)
pin 7 - RK (red cathode)
pin 8 - G2 (screen grid)
pin 9 - KG (green cathode)
If the pinouts are the same, the CRT should be electrically equivalent.
However, the plastic end cap that indexes the CRT pins to the CRT socket
may not be the same. This may prevent mating the socket to the picture
tube. On some CRTs this cap is loose and can be removed from the end of
the neck. If so, you can slide the caps off and swap them between picture
tubes. If the cap is glued on the end of the CRT, you probably will not
be able to remove it. Remember, this is the most fragile part of the
picture because the cap surrounds the nipple from which the air was
originally evacuated from the picture tube. One false move and you'll
break the seal and let air into the CRT (or as one of my Arcade School
students put it, "you'll let the vacuum out!".) If the end cap is glued
on, you'll probably have to leave it. In this case, you may be able to
swap the CRT socket itself but it's a hassle and I don't usually make the
CRT swap if I have to mess with it to that extent.
That's about all there is to it! Although you may not be successful in
all cases, you've got nothing to lose by trying a CRT transplant. If it
doesn't work, you will probably not wreck anything. If it does work,
you'll have another monitor to put out on the route!

